Send Croct data to Microsoft Clarity
Filter session recordings and heatmaps.
This integration connects Croct to Microsoft Clarity. Once set up, it tags every Clarity session with the experiences the visitor sees, the audiences they fit into, and the experiments they participate in, so you can watch recordings and heatmaps segmented by those.

Filtering recordings by experiment variant shows you not only which variant won, but how visitors actually behaved on each one.
How it works
The integration is a single script that reads the visitor’s session data from Croct and sets it as custom tags on Clarity.
Because a session’s audiences, experiences, and experiments can change throughout the session, the tags are refreshed on every pageview, even for single-page applications.
Once the tags are set, the integration tracks a ClarityTagsSet event, so you can confirm from the user’s timeline in Croct when the data reached Clarity.
The integration waits for the Clarity tracking code when it has not loaded yet, so the tags are set regardless of which script loads first.
Tags
The integration sets the following custom tags on the Clarity session:
| Tag | Value |
|---|---|
| croct_experiences | The names of the experiences that impacted the session. |
| croct_audiences | The names of the audiences from the experiences the user fits. |
| croct_experiments | The name of each running experiment and the variant assigned to the session. |
Every tag holds the full list of values, so a session that matches three audiences carries all three names under croct_audiences.
Once the tags are flowing, you can use them in Clarity to:
- Filter session recordings by audience, experience, or experiment variant.
- Compare heatmaps between the variants of an experiment.
- Spot where personalized visitors drop off, rage click, or hesitate.
Prerequisites
Before you start, make sure you have:
- A Croct account with a workspace and application set up.
- The Croct SDK installed in your project.
- The Microsoft Clarity tracking code installed on your site.
Send data from Croct to Clarity
You can add the integration in one of two ways:
- Add a script tag directly to your website’s source code.
- Use Google Tag Manager to inject the script without changing the source code.
Add a script tag
Add the following script to your website’s HTML, either in the <head> or the <body>:
<script src="https://cdn.croct.io/plug-integration/clarity.js"></script>Use Google Tag Manager
If you prefer not to edit your source code, you can use Google Tag Manager (GTM) to inject the script for you.
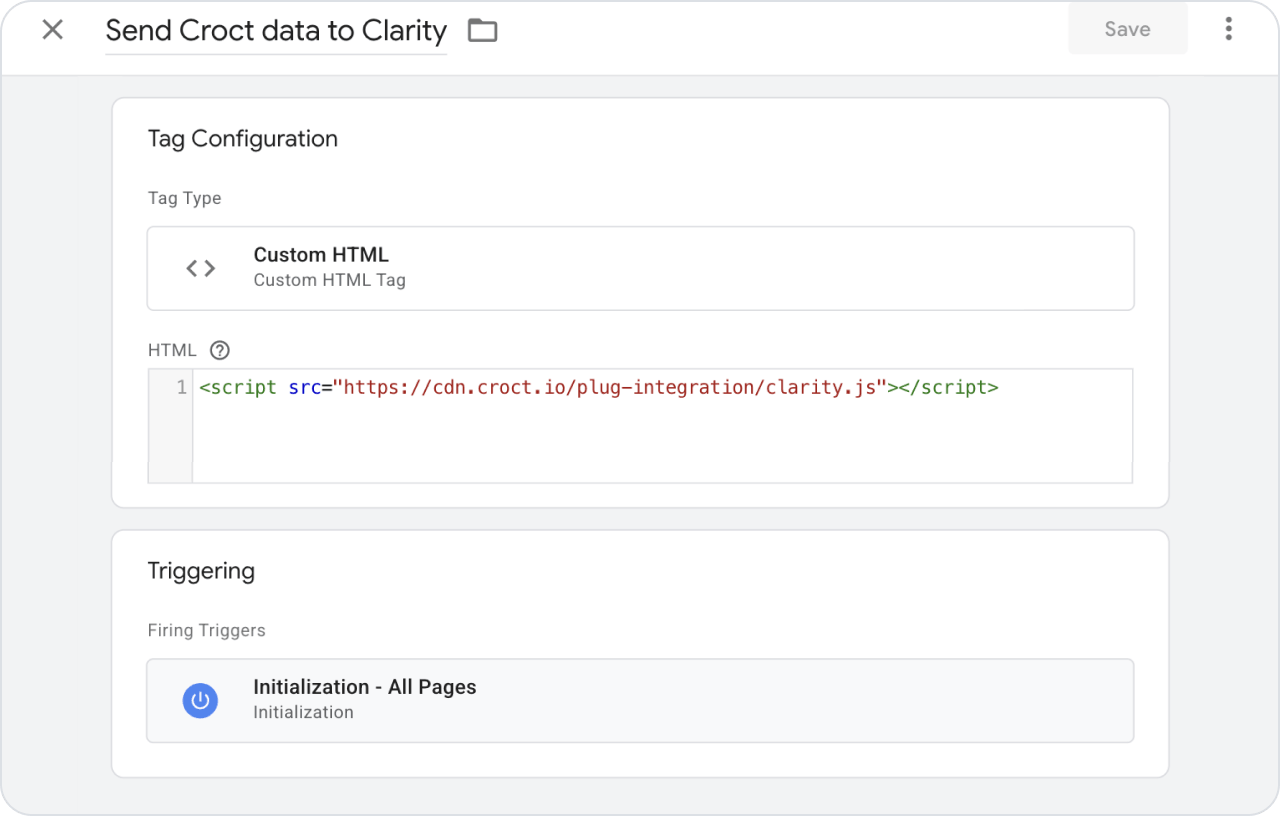
In Google Tag Manager, select Tags > New.
Name the tag as Send Croct data to Clarity.
Set the tag type to Custom HTML.
Copy and paste the following code into the HTML field:
Custom HTML tag<script src="https://cdn.croct.io/plug-integration/clarity.js"></script>Select the trigger Initialization - All Pages, so the tags are set as early as possible on every page.
Click Save, then Submit to publish your container.
Your tag should look like this:
Verify the integration
Once the script is live, confirm that the tags reach Clarity.
- Browse your site
Open a page where you have an active experience or experiment running, and navigate through a few pages.
- Check the tags in Clarity
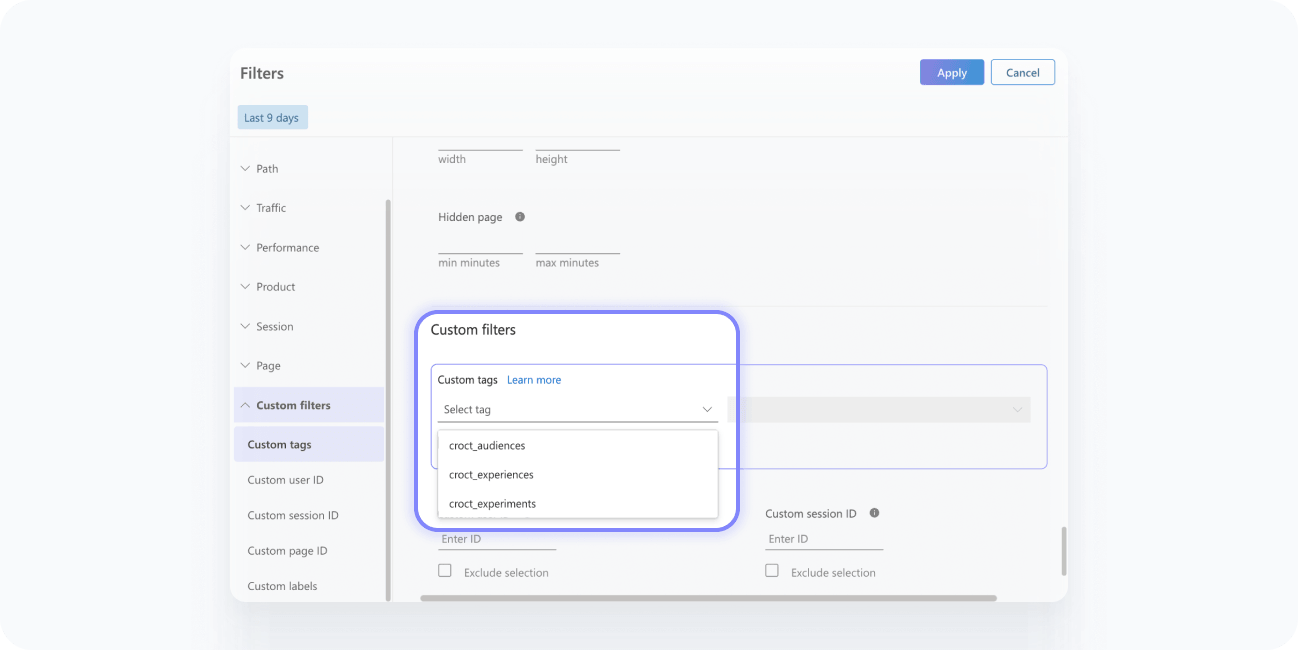
Open your Clarity dashboard, go to Recordings, and filter by the croct_audiences, croct_experiences, or croct_experiments custom tags. Recordings may take a few minutes to appear.
- Check the event in Croct
Open the user profiles page in the admin app, open your profile, and look for the ClarityTagsSet event in the Timeline tab.
With our segmentation data available in Clarity, you can now review how each audience and experiment variant behaves and turn what you observe into your next experience.