Activate 6sense firmographic data
Target high-intent accounts with a tailored message using 6sense data.
In this tutorial, you will create an experience that displays personalized website content based on a visitor’s firmographic data from 6sense.
By the end, your website will dynamically adapt to an account’s industry, company name, or employee count in real time.

Since 6sense usually takes a few moments to load, the firmographic data might not be available on the first page view.
Prerequisites
Before you start, make sure you have:
- A Croct account with a workspace and application set up.
- The Croct SDK installed in your project.
- The 6sense Website Tag enabled on your website.
Send data from 6sense to Croct
To personalize the experience, you first need to capture the firmographic data identified by 6sense and store it in our user profiles.
The integration is a single script that listens for the 6sense identification event and pushes the resulting data directly into the user’s profile.
You can add it in one of two ways:
- Add a script tag directly to your website’s source code.
- Use Google Tag Manager to inject the script without changing the source code.
Add a script tag
Add the following script to your website’s HTML, either in the <head> or the <body>:
<script src="https://cdn.croct.io/plug-integration/6sense.js"></script>Once loaded, the script waits for 6sense to identify the visitor and then saves the firmographic data to the visitor’s profile.
Use Google Tag Manager
If you prefer not to edit your source code, you can use Google Tag Manager (GTM) to listen for the 6sense identification event and inject the script for you.
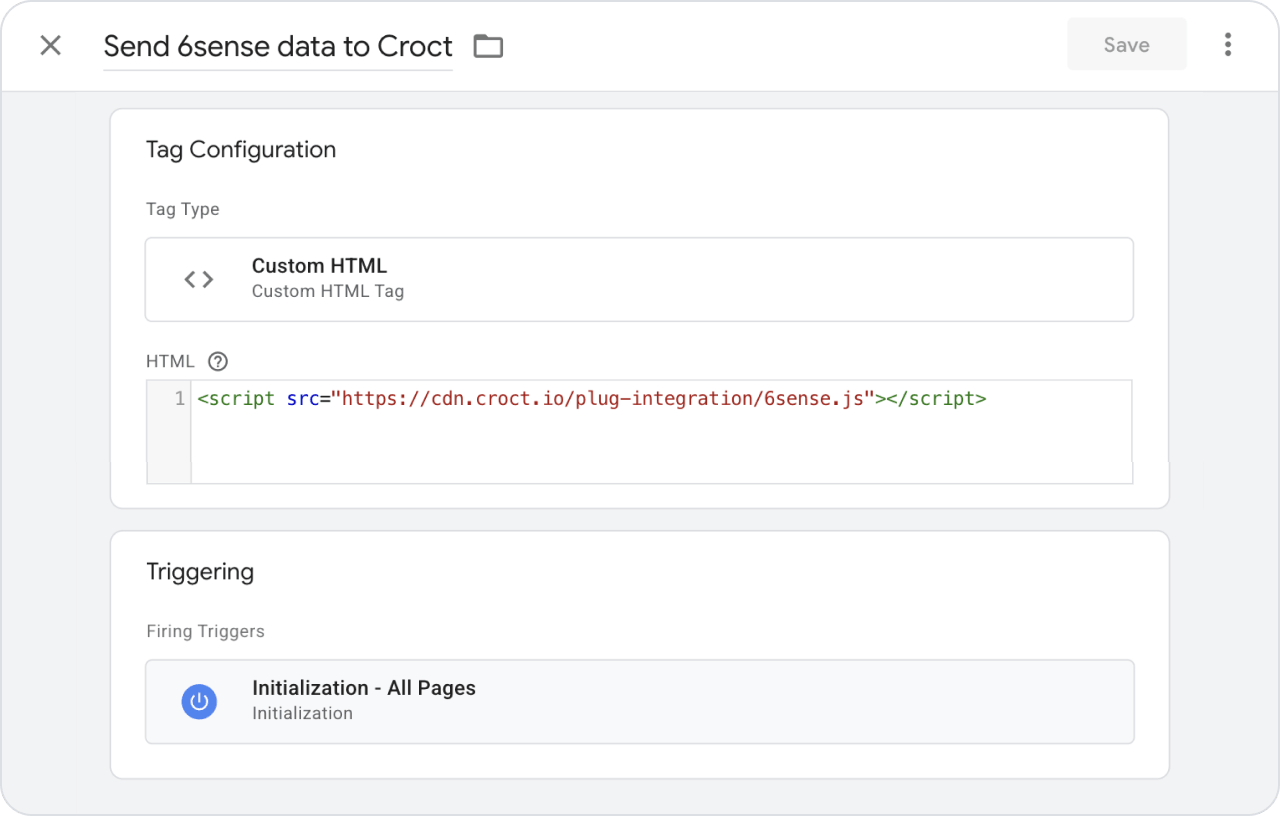
In Google Tag Manager, select Tags > New.
Name the tag as Send 6sense data to Croct.
Set tag type to Custom HTML.
Copy and paste the following code into the HTML field:
Custom HTML tag<script src="https://cdn.croct.io/plug-integration/6sense.js"></script>Select the trigger Initialization - All Pages.
Click Save.
When the trigger fires, the script reads the firmographic data from 6sense and saves it to the visitor’s profile.
Your tag should look like this:
Check user profiles
Once the tag is published and active, you can verify that the integration is working. It maps the firmographic data from 6sense to profile attributes and tracks an event when the data is ingested.
Open the user profiles page in the admin app.
Filter users using the Custom attributes or Work info tags and open one profile.
Open the Attributes tab and confirm that the firmographic data has been successfully ingested.
Open the Timeline tab and look for the 6senseDataRetrieved event to confirm when the data was captured.
Attributes
Company identity is stored using standard attributes, while the remaining firmographic data is grouped under the firmographics custom attribute.
| Attribute | Description |
|---|---|
| company | Company name. |
| companyUrl | Company website domain. |
| custom.firmographics.source | Always 6sense, identifying the source of the data. |
| custom.firmographics.status.match | Whether 6sense matched the visitor to a company. Values are either Match, Non-actionable Match, or No Match. |
| custom.firmographics.status.confidence | Confidence level of the match. Values are either Very High, High, Moderate, or Low. |
| custom.firmographics.status.blacklisted | Whether the company is excluded in your 6sense account settings. |
| custom.firmographics.status.hot | Whether the account is a 6sense qualified account. |
| custom.firmographics.profile.industry | Industry. For example, Financial Services. |
| custom.firmographics.profile.employees | Employee count range. For example, 1000+. |
| custom.firmographics.profile.revenue | Annual revenue range. For example, $1B+. |
| custom.firmographics.location.city | City. For example, New York. |
| custom.firmographics.location.state | State code. For example, NY. |
| custom.firmographics.location.country | Country, as a two-letter ISO code. For example, US. |
| custom.firmographics.identifiers.company | 6sense company identifier. |
| custom.firmographics.identifiers.sic | Standard Industrial Classification (SIC) industry classification code. |
| custom.firmographics.identifiers.naics | North American Industry Classification System (NAICS) industry classification code. |
| custom.firmographics.intentScores | Numerical intent score tied to a specific buying stage, keyed by product. The numerical range is 0-100. |
| custom.firmographics.profileScores | Numerical profile fit score tied to a specific profile fit, keyed by product. The numerical range is 0-100. |
| custom.firmographics.buyingStages | Buying stage, keyed by product. Values are either Purchase, Decision, Consideration, Awareness, or Target. |
| custom.firmographics.profileFit | Profile fit, keyed by product. Values are either Strong, Moderate, or Weak. |
| custom.firmographics.segments | Numerical IDs of the 6sense segments the account belongs to. |
Check the 6sense API documentation for more details.
The intentScores, profileScores, buyingStages, and profileFit attributes are objects keyed by 6sense product name, so you can use the score for a specific product.
Event
The event occurred event carries the following details:
{ "name": "6senseDataRetrieved", "details": { "confidence": "Very High" }}Troubleshooting
If the integration cannot ingest data on a given page view, it logs one of the messages below to the browser’s console.
[Croct] 6sense data is not available.
This happens when 6sense hasn’t identified the visitor yet. It’s informational, not an error, and it means we didn’t ingest any data for that page view.
[Croct] 6sense data is malformed.
This happens when 6sense delivered data that could not be parsed. No data is ingested for that page view.
Create experiences
Now that we are receiving data from 6sense, you can create audiences and personalize experiences.